Exposed Elastic Waistband
The top fabric opening of the skirt needs to be wide enough to pull over your hips.

The wide elastic needs to be cut to your waist measurement with the ends sewn together to form a band.

You may have a significant difference between the hip and waist band size. If the skirt fabric is too much to work with, look at making a fabric waistband to encase the elastic.

Because the waistband is smaller than the fabric opening, you will need to quarter mark the band and the skirt with pins.
Do this by laying the band flat on a table and put a pin in each side. Lay it out again with the pins in the centre, one behind the other. Pin each of the new sides and you will have each quarter of the band marked.
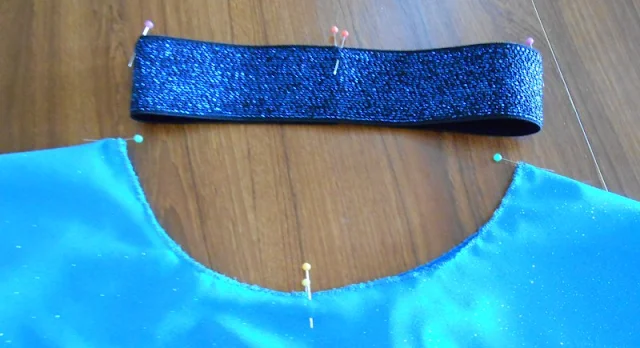
This may be easier to see in this child size skirt.
Use the same method to mark each quarter on the top of the skirt.
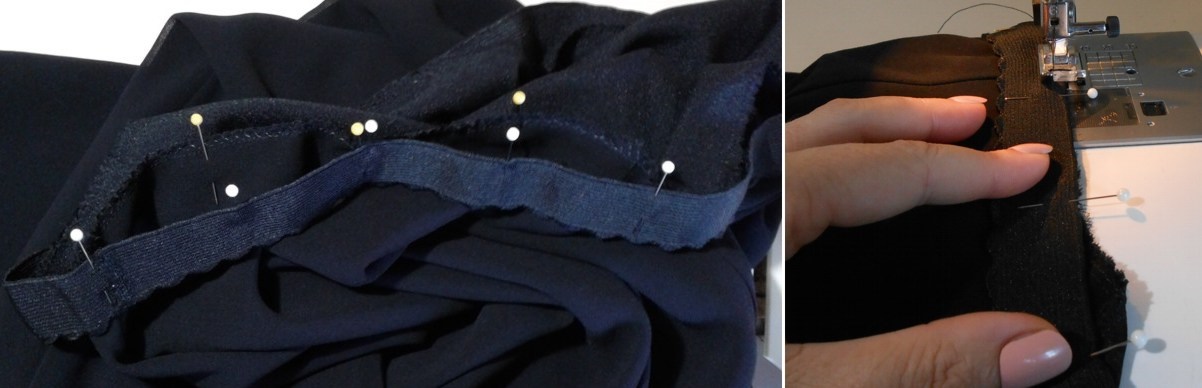
In most cases you attach the good side of the fabric against the good side of the elastic (the back of the joined seam facing out), pin the edges together at each quarter marks.

Put more pins between the quarter pins until the band is fitted to the skirt all the way around.
To mark each new half way point, fold the elastic and fabric away from each other (between existing pins), then pin those points together.

Sew the band onto the skirt with a straight stitch by stretching the elastic as you sew.
To start, firmly hold a pinned section of the skirt and elastic behind the sewing machine foot.
With the other hand, stretch the elastic feeding under the foot toward you while you sew.
Move slowly and stop as needed to pull out the pins.

This finished skirt has the joined edge of the elastic sewn into the top seam.

A decorative elastic may be sewn flat on the outside of the skirt like this one.

The wide elastic needs to be cut to your waist measurement with the ends sewn together to form a band.

You may have a significant difference between the hip and waist band size. If the skirt fabric is too much to work with, look at making a fabric waistband to encase the elastic.

Because the waistband is smaller than the fabric opening, you will need to quarter mark the band and the skirt with pins.
Do this by laying the band flat on a table and put a pin in each side. Lay it out again with the pins in the centre, one behind the other. Pin each of the new sides and you will have each quarter of the band marked.

This may be easier to see in this child size skirt.
Use the same method to mark each quarter on the top of the skirt.
In most cases you attach the good side of the fabric against the good side of the elastic (the back of the joined seam facing out), pin the edges together at each quarter marks.
Put more pins between the quarter pins until the band is fitted to the skirt all the way around.
To mark each new half way point, fold the elastic and fabric away from each other (between existing pins), then pin those points together.

Sew the band onto the skirt with a straight stitch by stretching the elastic as you sew.
To start, firmly hold a pinned section of the skirt and elastic behind the sewing machine foot.
With the other hand, stretch the elastic feeding under the foot toward you while you sew.
Move slowly and stop as needed to pull out the pins.

This finished skirt has the joined edge of the elastic sewn into the top seam.

A decorative elastic may be sewn flat on the outside of the skirt like this one.