How to - MS Photos
While this is not my photo editing program of choice, MS Photos comes free as part of current Windows PCs. I find this one limited in some aspects but has some nice automated features, making it fairly simple to do quick clean ups of scanned photos showing their age.
Like other programs or apps, you can search your PC. Open the program and search for your photos with the menu from the bottom, left of your screen.
If you don't find the App, depending on the age of your PC and version of Windows, you should be able to do a web search and install it for free from the Microsoft Store.
Another way you may find easier, to open your photo of choice into the app, is to first open the file folder you have previously saved you photos to. On your keyboard, Press and Hold down the Windows key and the E key, then release to open 'Windows Explorer' and navigate to the correct folder.
Click on your chosen photo with the right mouse button to open the menu, and click with the normal left mouse button on 'Open with' and 'Photos'
With 'Photos' you can step through other images in the same folder of photos. The arrows to step to the next image will appear on the middle sides of the image when you run your mouse over them.
The icon at the bottom left will open and close a Filmstrip view, to quickly select the photo you want.
To start editing your photo in MS Photo, Click the 'Edit image' icon.
A new edit menu bar will be displayed above the photo.
The 'Mark up' tool gives you the ability to hand write or draw on the photo. If you want to type on the photo, use the MS Paint App. To draw, simply click on one of the pen or highlighter tool. To remove selected drawings, select the second last tool at the bottom and then click on each part you want to remove. To clear all drawings, click on the last tool.
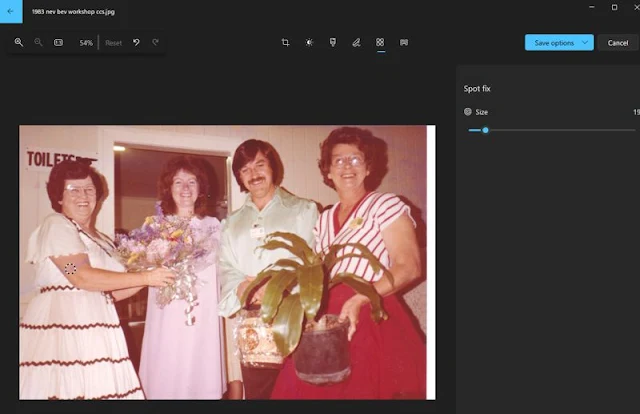
Select 'Retouch' to access the Spot fix tool. Click and drag to the require edit size.
You can see the photo above has some purple marks staining the photo. The spot fix feature does a fairly good job of clearing this up by selecting the size of the area to correct and then click the spot you want to blend into the background colour.
This very quick edit shows some improvement but not a perfect fix as it blends surrounding colours. The size of the spot you use controls the accuracy of the edit or how wide the blend of colours is. It works great on removing dust and scratch marks on the background of photos.
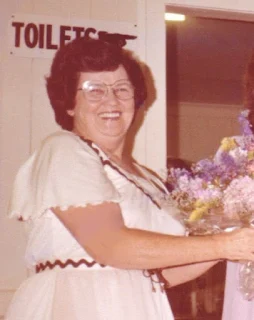
An edit has been made across the wall, dress and arm.
The spot below the toilets sign has also been touched up.
The final tool on the top menu bar is 'Background' this is not really useful for basic photo restoration but is a novel effect tool. The background is automatically picked out by the program and you have a choice to 'Blur', 'Remove' or 'Replace' the background with a selected colour.
Turn on the 'Background brush tool' to replace or remove some of the automatically selected parts.
Click the link to check out the MS Paint instructions that describes adding typed text to your photos.
To bring all your photos together to create your Slide Show follow the link to the instructions.


