A slide show of photos can be enhanced by adding some written information on each photo.
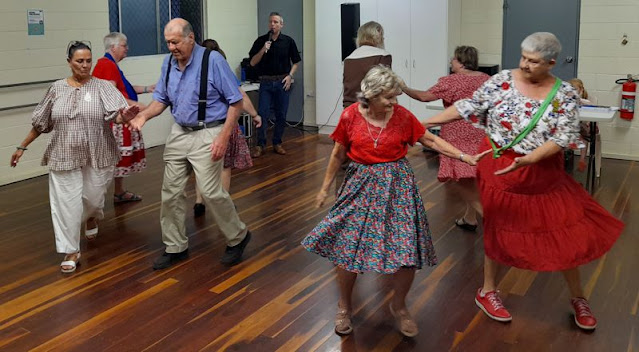
In this example, I have scanned an old printed album photo to create a digital photo.
No edits have been done to the photo itself here. This is the most basic edit, adding white text with a filled black background.
The photo has some flaws with stains and scratches. The colour and contrast could also be improved. If you want to learn about cleaning up a photo first, follow the link to MS Photos instructions.
To bring all your photos together to create your Slide Show follow the link to the instructions.
If your photo is good enough to use as is, or you don't have the time or interest in extra photo editing, you can just add text using the free Windows program MS Paint.
To find the Program or App on your computer, Click the Windows Icon at the bottom left of your screen to bring up a search window for apps, settings and documents. Type, Paint, and select the App to open it.
(You can use the search bar at the bottom of your screen, next to the Widows Icon but this may also search online and look for extra things you don't need)
Click on File and then Open. Navigate to the photo you want and Open it into Paint.
If the photo opens and you can't see the whole image, Click on View, Zoom and then Fit to Window.
Make sure you save the photo you are editing with a new name so you don't loose the original.
The Undo Tool can be useful but may not always work. Click to step back one edit at a time.
You can also use the keyboard function to undo an action. Hold the Ctrl key down, hold down the Z key and then release both.
To type on the photo, select the Text tool, by clicking on the symbol of an A on a page.
The text properties bar will appear. Use this to change the font type, size and position.
If you want the effect used in my example, select Background fill by checking the box.
The large circles next to the smaller colour pallet circles indicate the chosen colour.
The top circle is the text colour and the bottom circle is the background colour.
Click each of the large circles to select it and a smaller circle to change its colour.
Click on the image to add the text box. You can resize it by dragging the squares on the corners or sides.
To move the whole text box, move the mouse to an edge away from a square until a four way cross appears. Click and drag the symbol to move the text box.
Important - Finalise all text editing before clicking anywhere outsize the box on the photo or selecting non text related tools.
Once the text box is un selected it can not be re edited. Clicking somewhere else on the photo while the Text Tool is selected will cause a new text box to appear and the first box will no longer be editable.
If you are happy with your new text Save your photo as a JPEG picture and give it a file name that also describes the photo.
If needed, you can rename the photos later.
To automatically play in them in a set order on a TV Slide Show, name the images alphabetically or numerically.
More on MS Paint and MS Photos Editing -
While MS Paint and MS Photos are, free included, Windows programs / Apps, limited functions can be a little frustrating if you have previously used programs with more features.
Both have more functions than I have gone into and if you haven't gotten use to a particular editing program, between MS Paint and MS Photos you may find with a little trial and error, it could do everything you need without having to pay for something more advanced with steeper learning curves.
One function you may find useful is the ability to cut a photo down to frame the subject better. This is called Cropping.
Cropping a photo with MS Paint
You can also Crop your images with
MS Photos which you may find easier, especially if you are going to be using it to edit other aspects of the photos.
If the photo has extra space you wish to remove it can be cropped in a few ways.
This is the simplest method in Paint -
If the outside of the photo only displays small boxes on the corners and the middle of each side (without a dotted line around the photo) a square can be clicked and dragged to the point you want cropped. On releasing the mouse, the crop will be instant.
Alternatively you can make the Selection of the rectangle to click and drag around the area you want to crop. This needs to be started from outside the edge of the photo and cross the photo at the correct cutting point. If it is not in the right spot, click the undo and try again. Don't drag the dotted line box or it will distort the ratio by squashing or stretching the photo.
If the box is in the correct place, you can click on the Crop symbol that should now be available (turned black, instead of grey) or click the right mouse button to select it from the menu.
Resize a photo.
For photos on a TV slide show or printing, you want the size and quality to be large but if you are adding a photo to a website you may need to reduce the Pixel size to comply with the web editor you are using and to reduce the load time of your website.
In
MS Paint, you have the ability to resize a photo from the Image tools group, Resize and Skew.
MS Photos can resize a photo from the top right on the menu bar. (before clicking on the Edit button)
Click, See more ... to open the drop down menu. This feature can make stepping through a folder of photos for resizing fairly quick.
To bring all your photos together to create your
Slide Show, follow the link to the instructions page.